1-Using PC.
-Go to https://zoom.us/
-Click on “SIGN IN”.
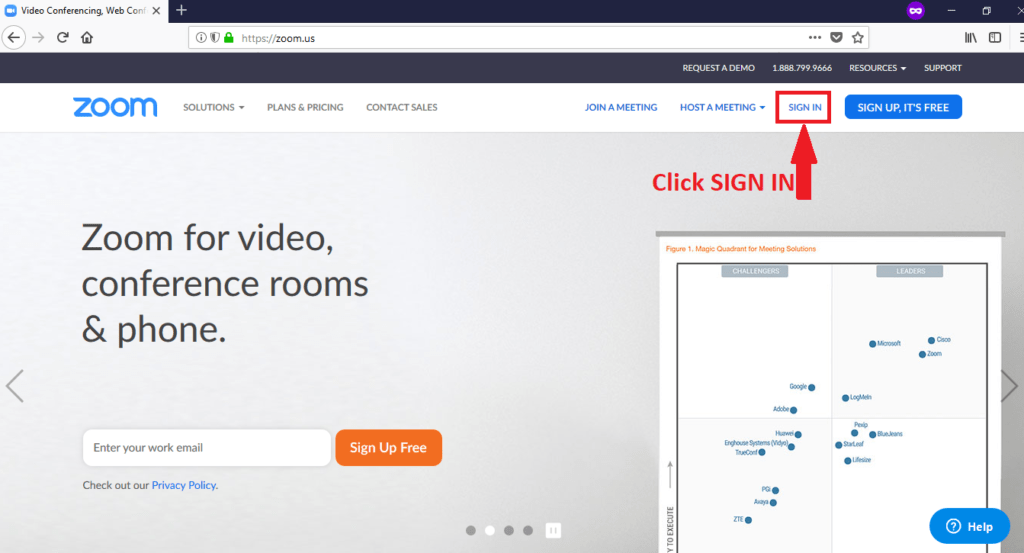
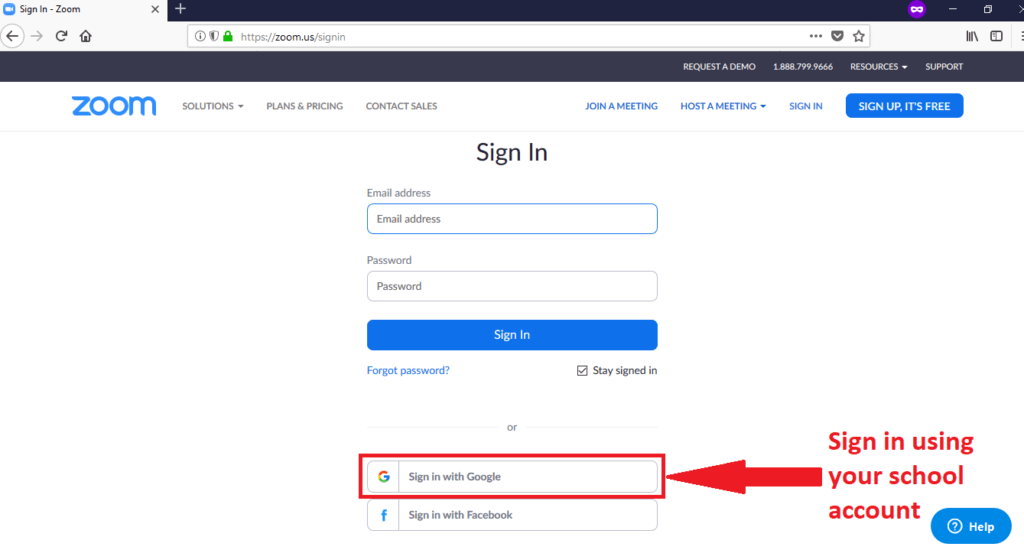
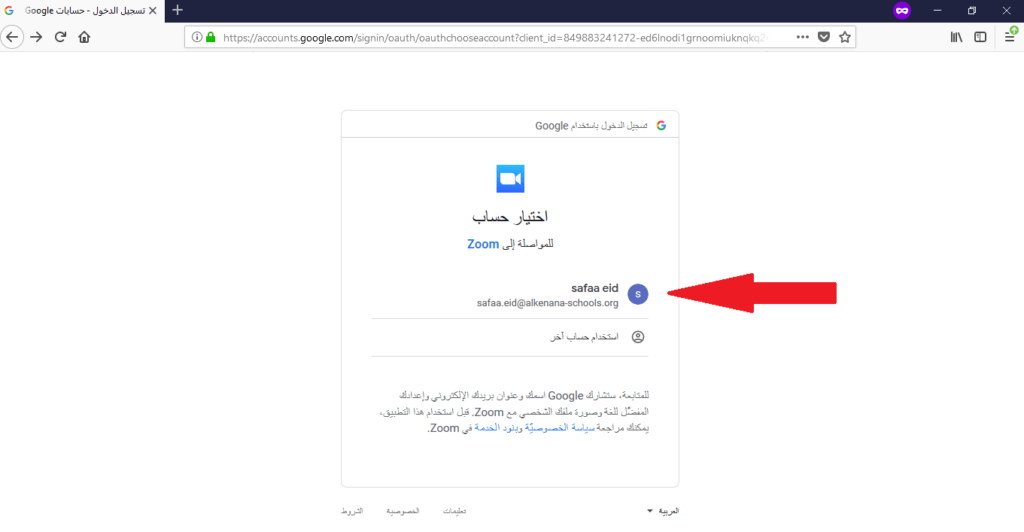
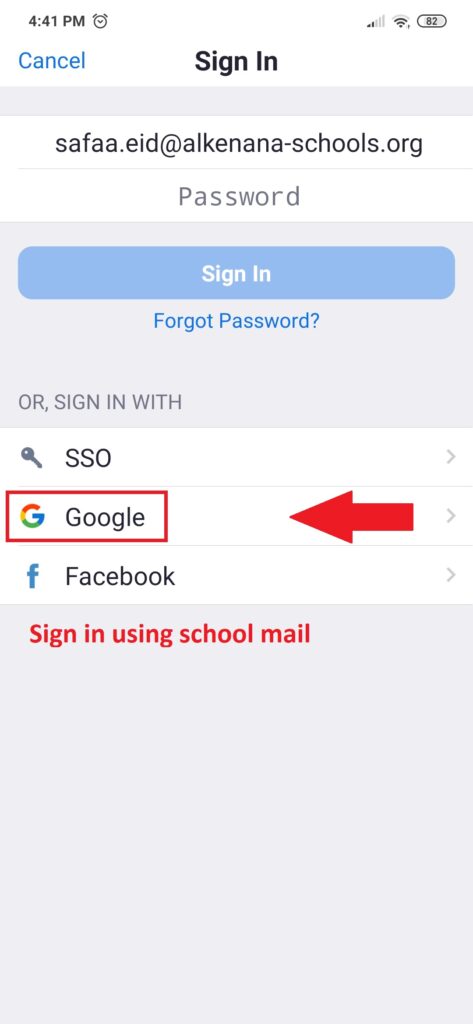
-Make sure that you open on your browser with your school mail ” @alkenana-schools.org”.
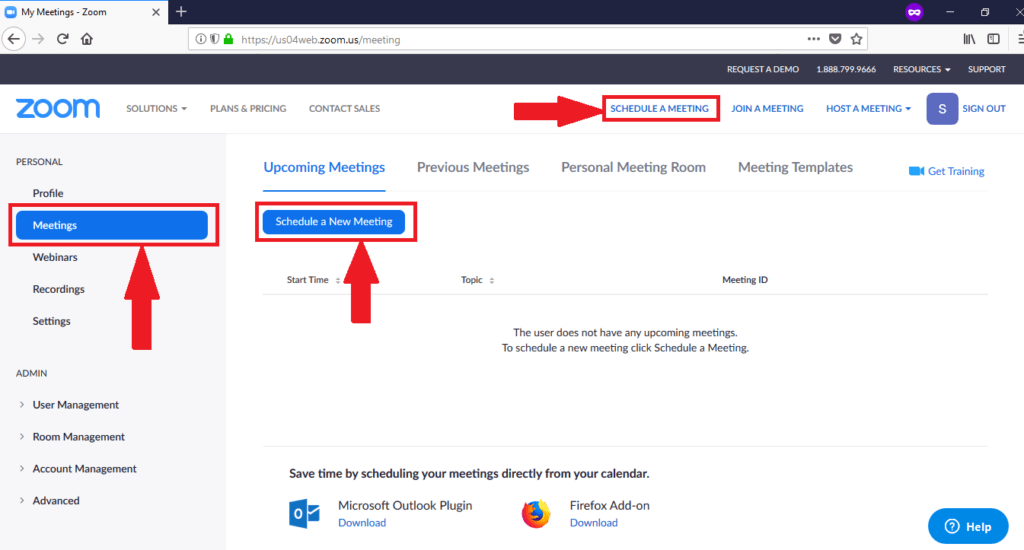
-Click on ” Schedule Meeting”.
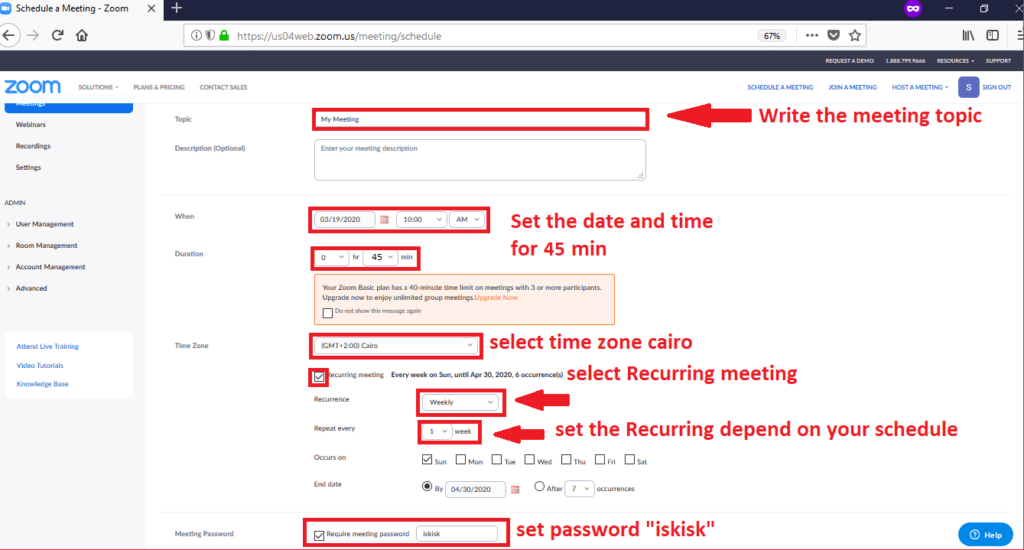
-Fill the topic name, the date and the duration of the meeting….. —-Follow the steps.
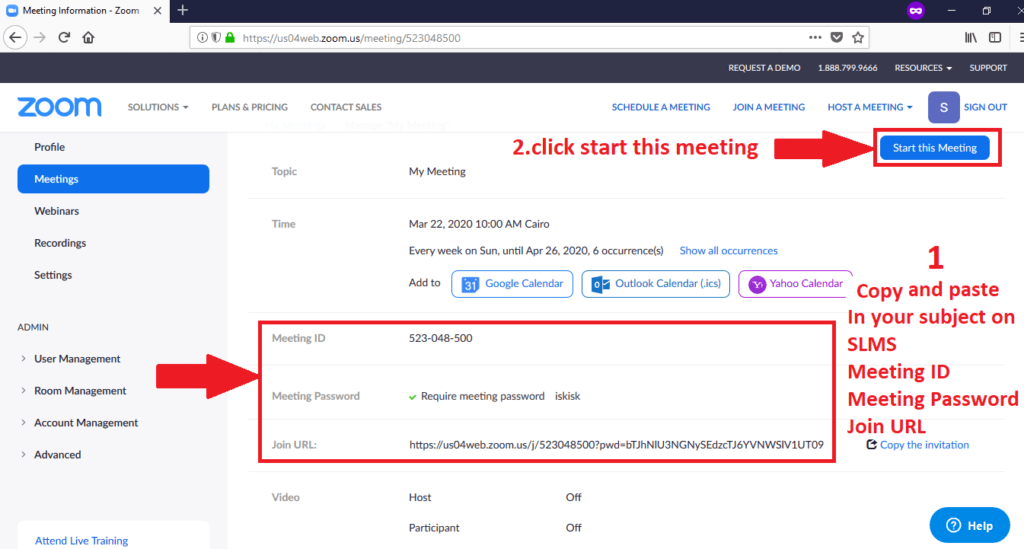
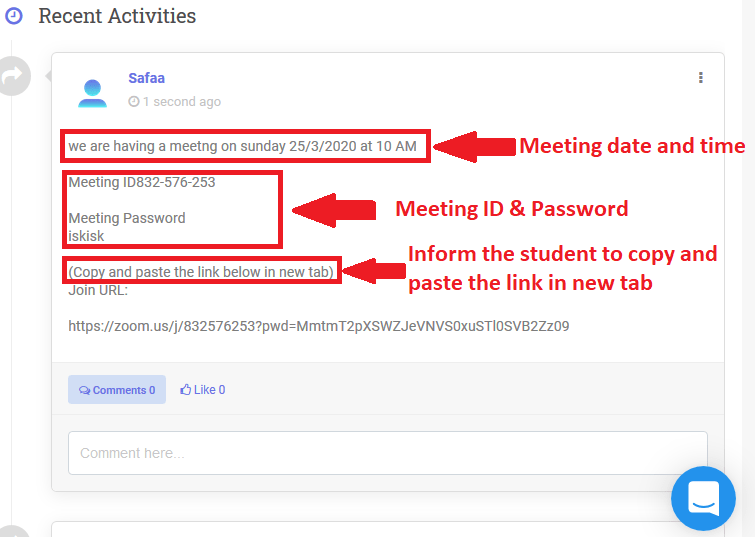
-Copy the “meeting ID ,Meeting Password ,Join URL” and paste it on SLMS in your own subject Then Click on “start this meeting”.
-Do not forget to mention the meeting( date and time) for the students on discussion.
- and inform your students if they will use the join link that the Join URL is not clickable they have to “copy the link and paste it in new tab”.
-The browser will ask to download zoom file download it ,then click it to set it up.

-Once zoom is opened you will see this
-Follow the steps.
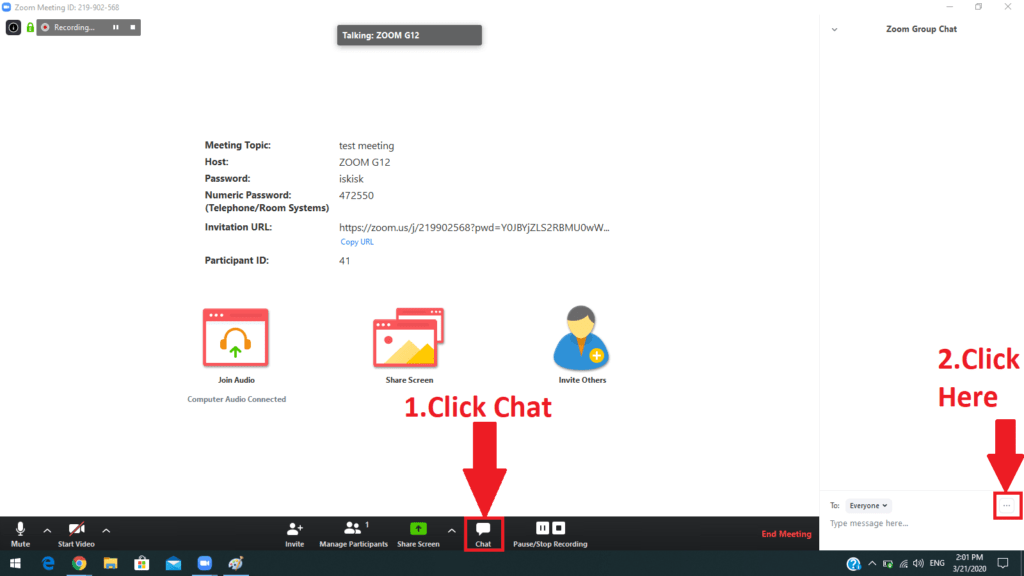
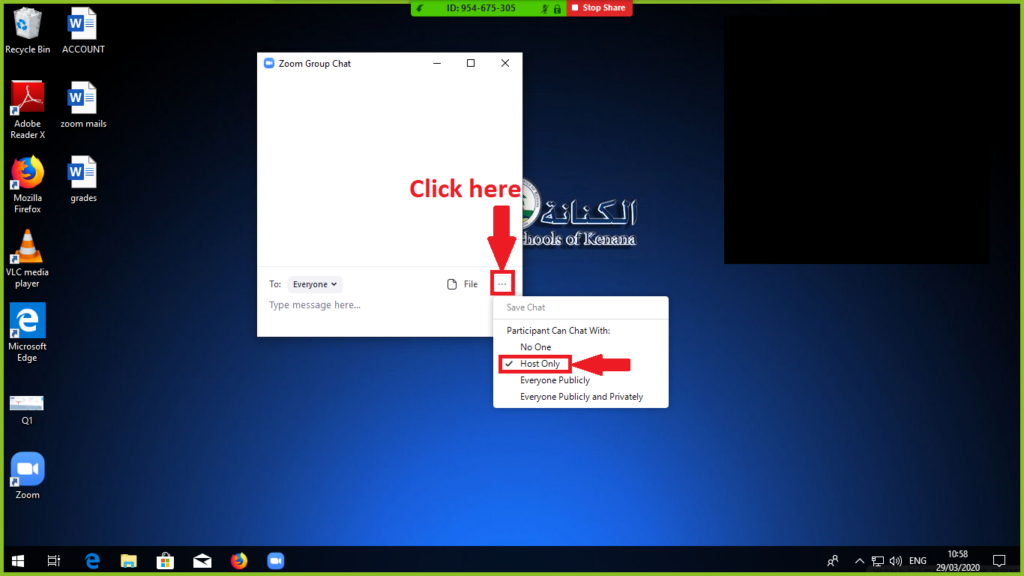
-You can prevent the students from chatting with each other and chat only with you.
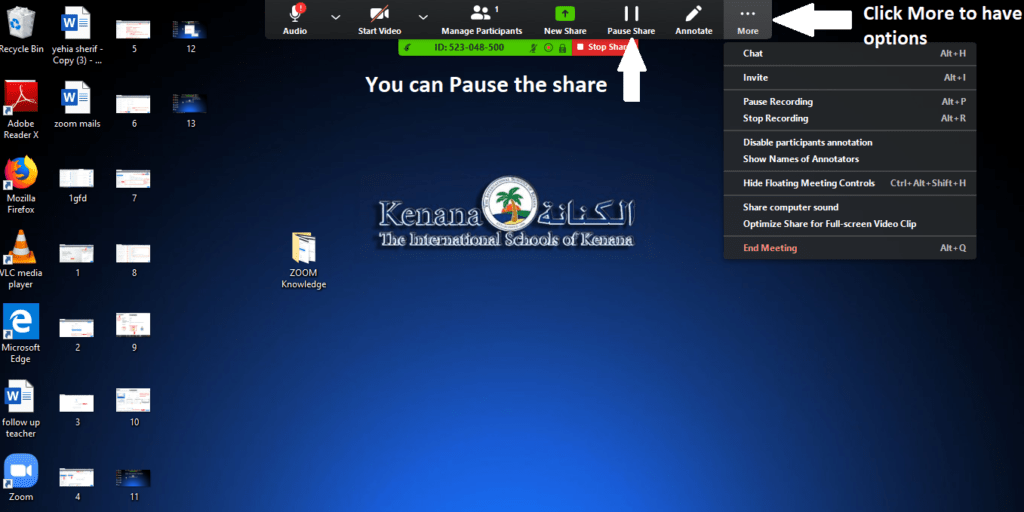
-The upper menu is opened all the time as you can use it.

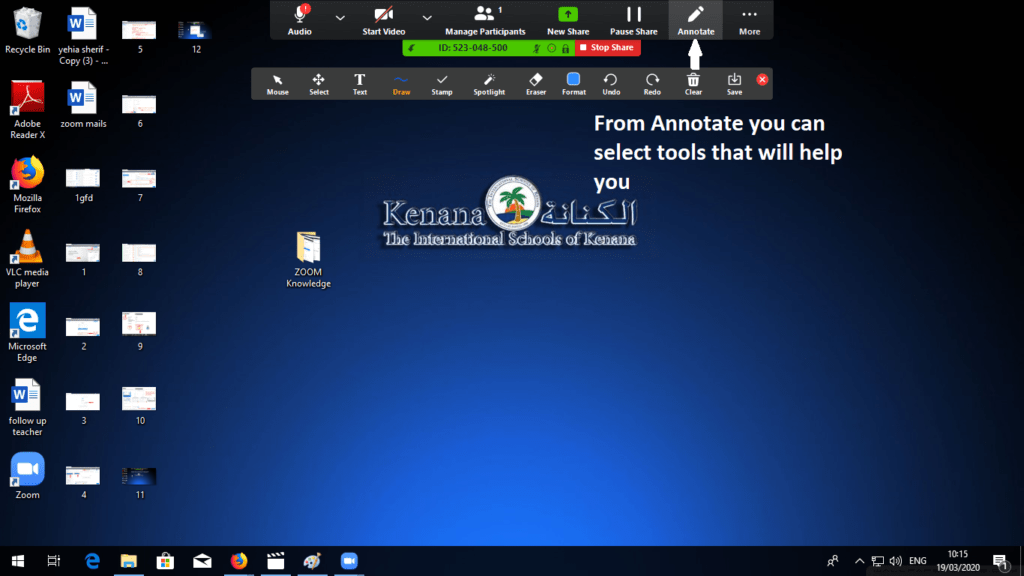
-Click annotate to have a lot of tools that will help you in your lecture….arrows,text,eraser…..
-To stop the students from drawing on your screen.
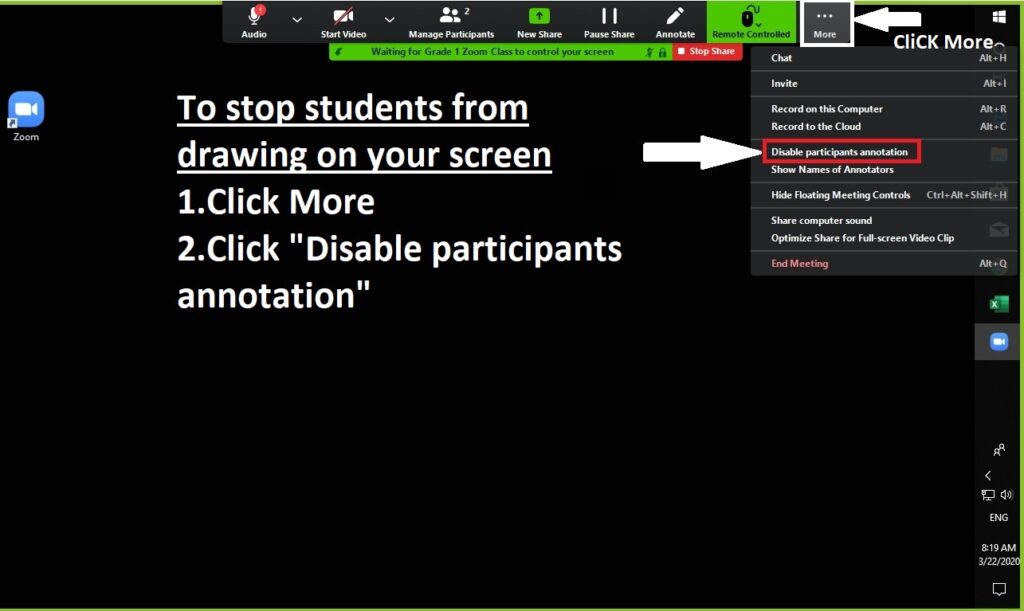
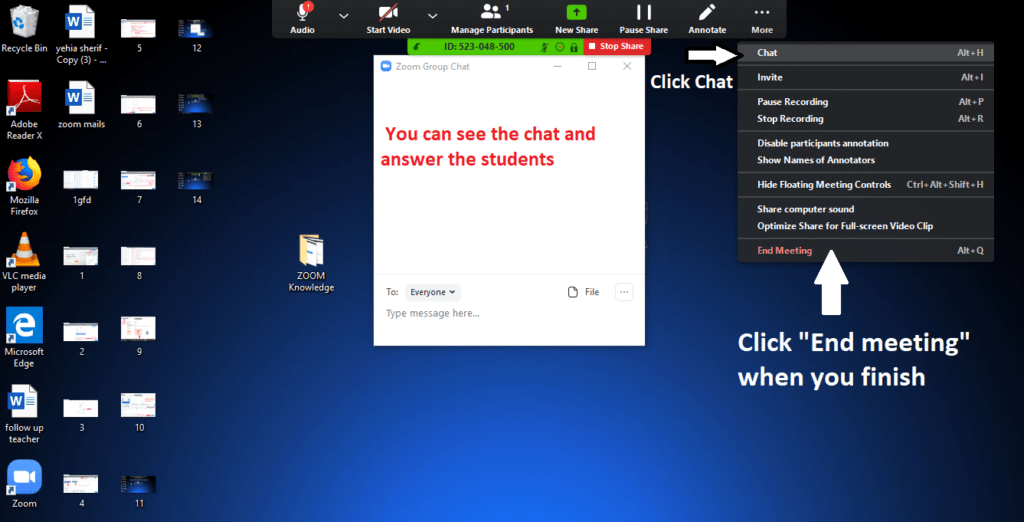
-From more you can have a lot of options you can use—record ,invite,chat,end meeting.
-Pick a file that will help you in your lecture,and you can start your session.
-Once you clicked “End Meeting”, zoom program will convert the video and you will find it on document folder.
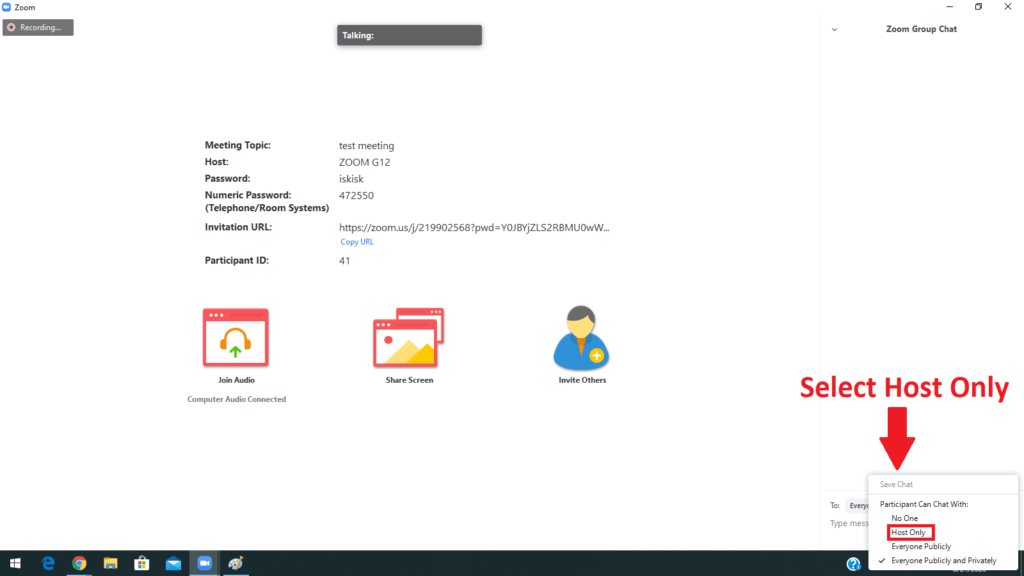
-To stop the students from chatting with each other and to chat with you only ,open the chat and follow the steps.
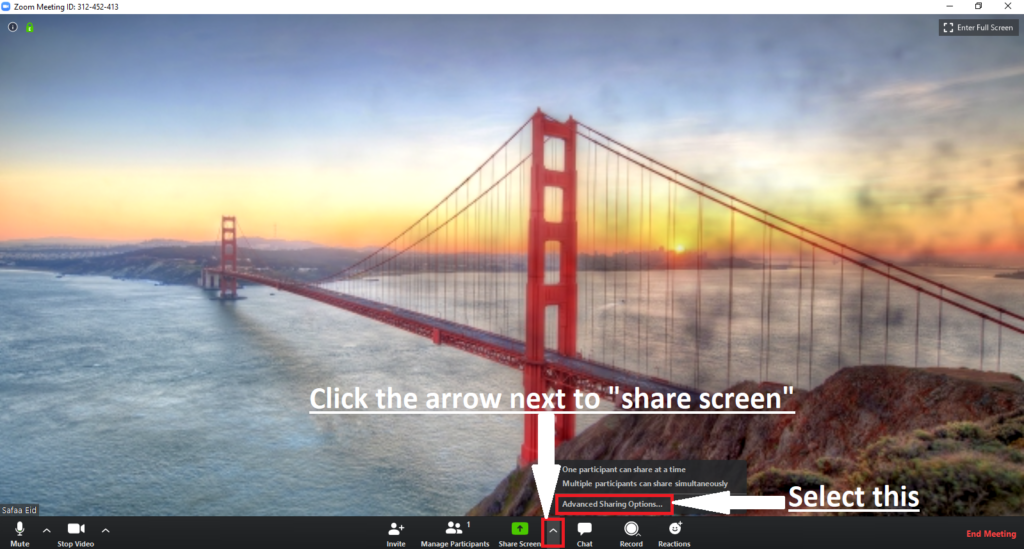
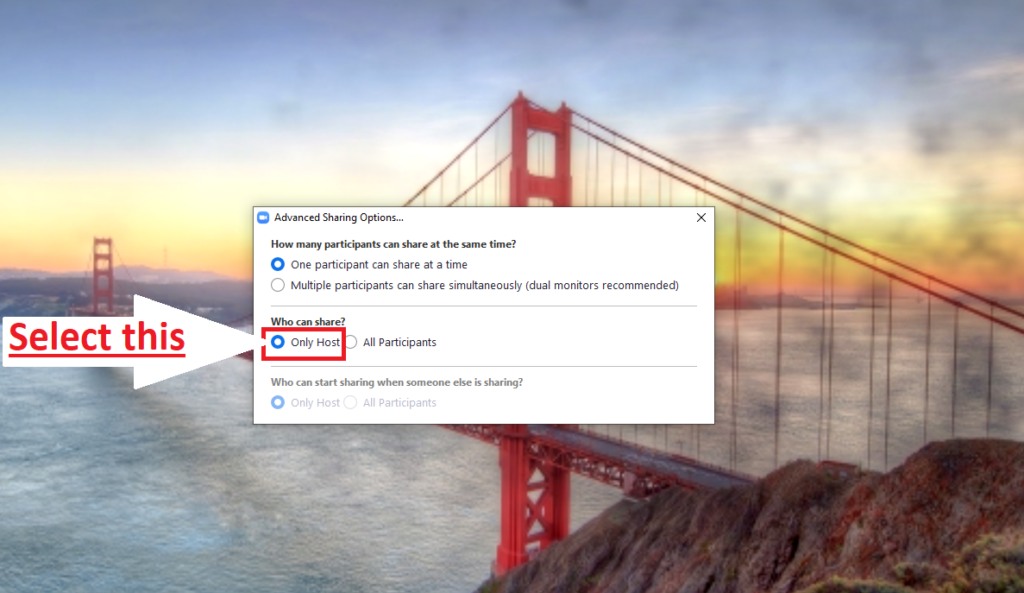
-To stop the students from sharing their screen do the following
-In the latest version of zoom a new security icon has been added for host (teacher) only.
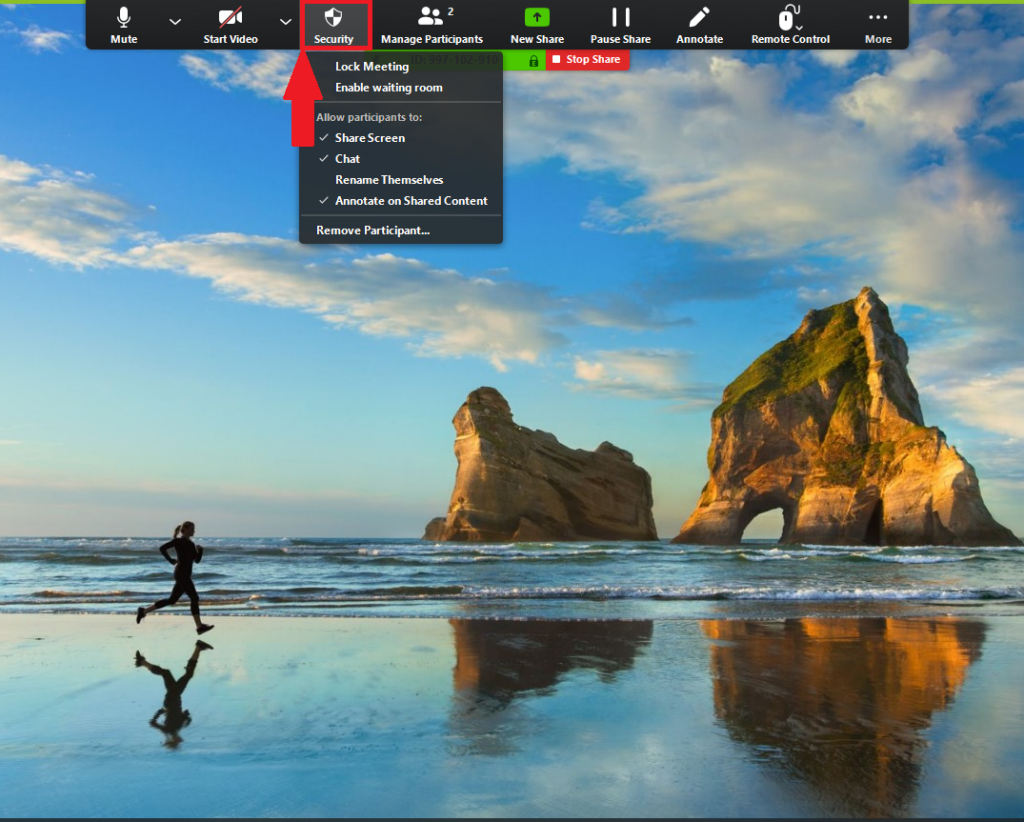
By clicking the Security icon, hosts and co-hosts have an all-in-one place to quickly:
- Lock Meeting: Locks the meeting, keeping new participants from joining the meeting.
- Enable Waiting Room: Enables Waiting Room for incoming new participants or to move current participants into the Waiting Room.
- Allow participants to:
- Share Screen: Allows participants to start Screen Shares
- Chat: Allows participants to use the chat function.
- Rename Themselves: Allows participants to rename themselves from the Participants panel.
- Annotate on Shared Content: Allows participants to annotate over content shared during the meeting. The host can enable or disable annotation when the host is sharing.
- Remove Participant: Allows the removal of a participant from a meeting. The participant can not re-join unless Allow removed participants to rejoin is enabled in Meeting settings.
-To avoid the CONVERSION time between session follow this steps:
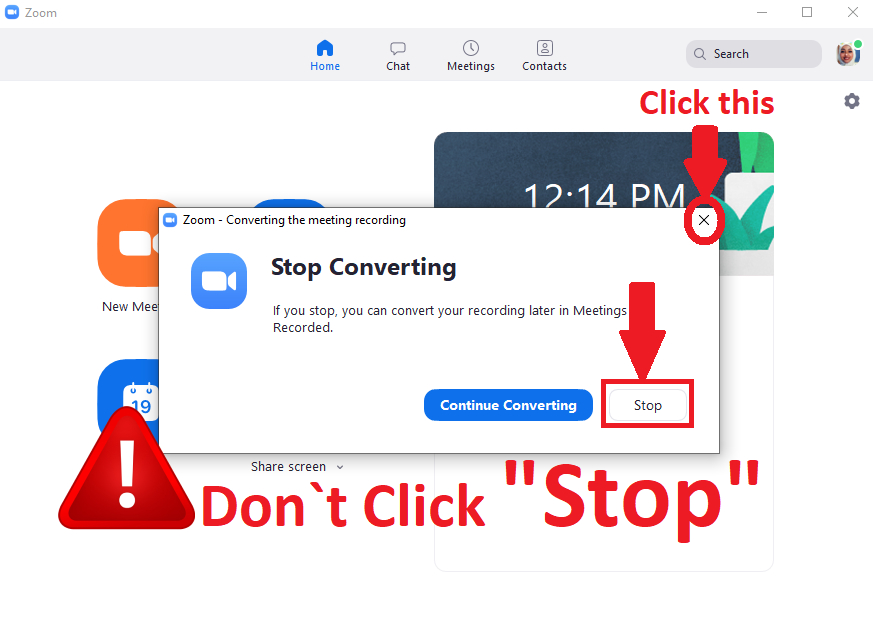
-After you end your meeting zoom program will convert the recorded session as usual ,Click “Stop Converting” the first time only and close the window …go to the next class and do your live session.

-P.S don`t click stop that appear in the next window just close it.
-To get your the session that you stopped converting it , open the program and click “Meeting”.
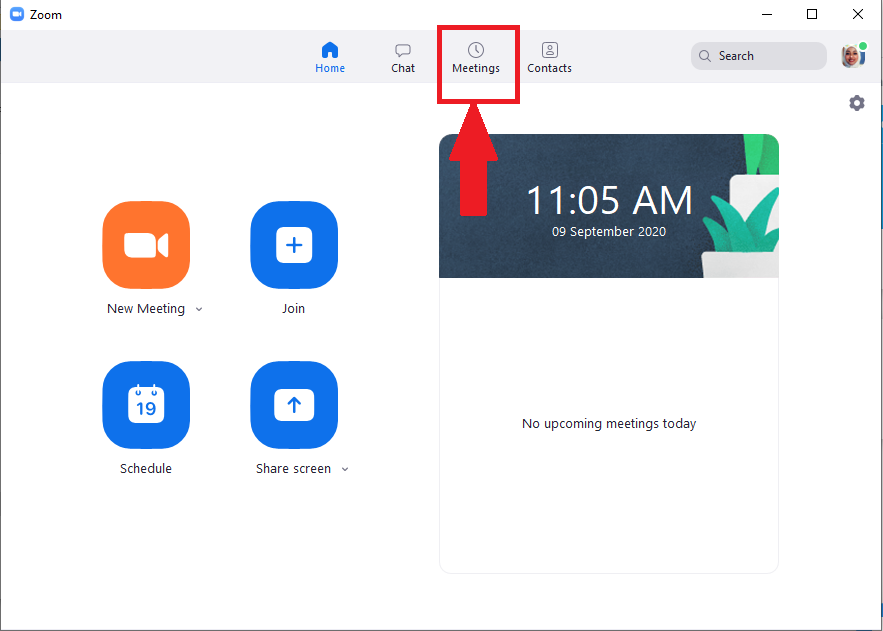
-Go to “Recorded”.
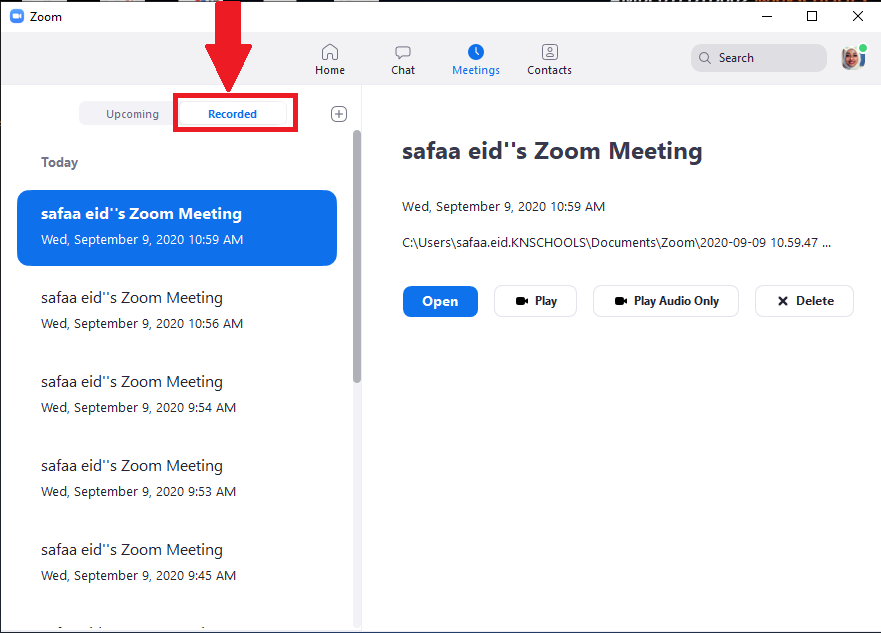
-Select the session that you stopped converting it,then click “Convert”.
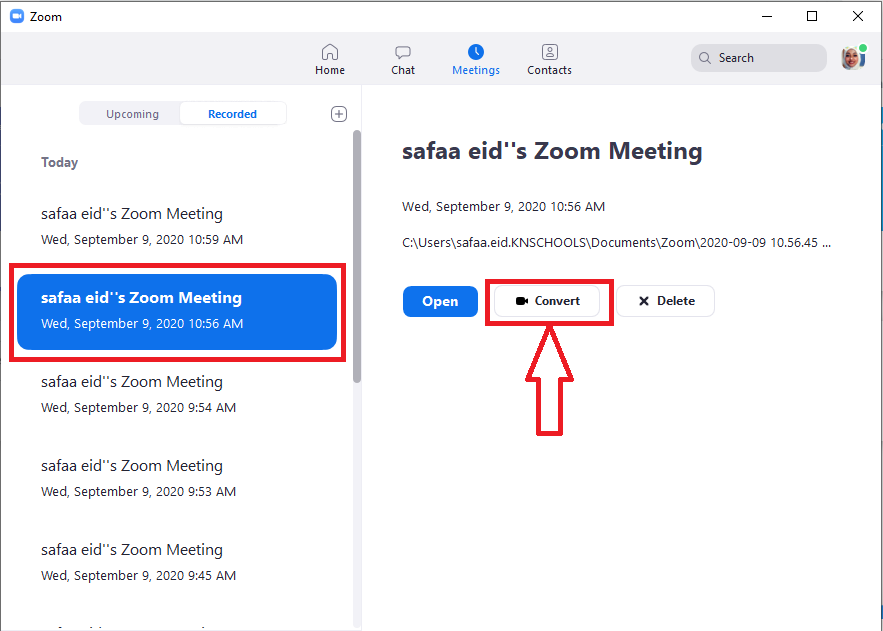
-The session will convert as usual.

-For more clarification please check the links below.
https://support.zoom.us/hc/en-us/articles/360041848151-In-meeting-security-options
https://blog.zoom.us/wordpress/2020/02/14/secure-your-meetings-zoom-waiting-rooms/
https://support.zoom.us/hc/en-us/articles/115005706806?zcid=1231
https://support.zoom.us/hc/en-us/articles/201362603-Host-and-Co-Host-Controls-in-a-Meeting?zcid=1231
https://support.zoom.us/hc/en-us
How to share the video ?
-Open Your mail and Click on the drive icon.
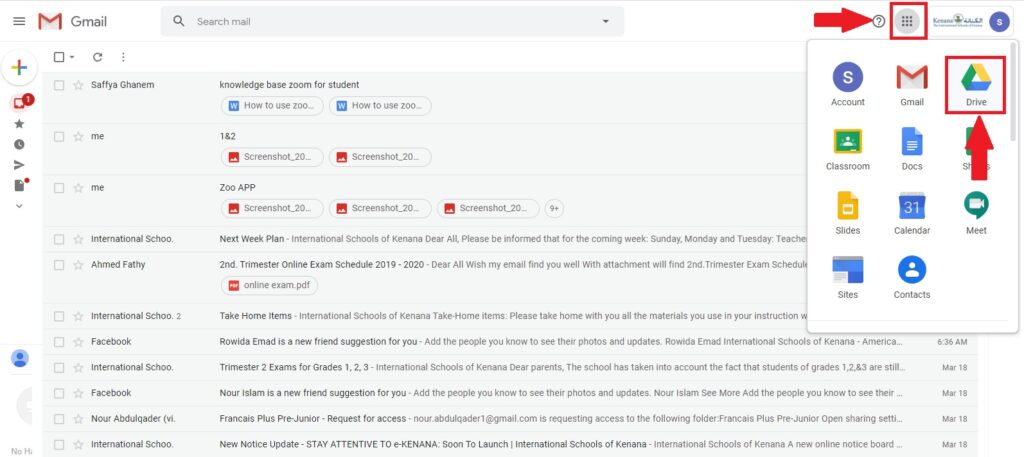
-Go to google drive folder (HOD should inform teachers where to put the recorded video in the google drive).
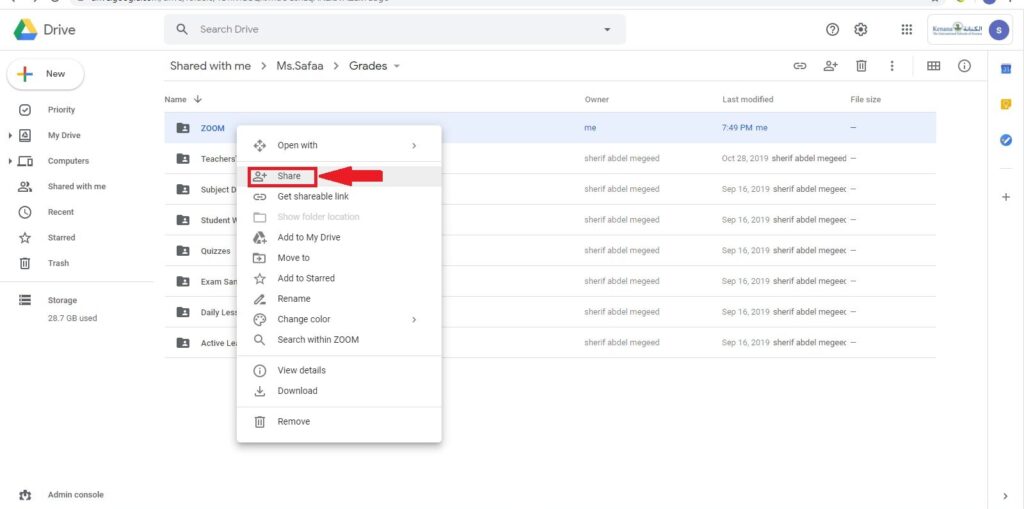
-Inside that folder make a folder for each grade (Upload the videos inside it) and share that folder with that specific grade .
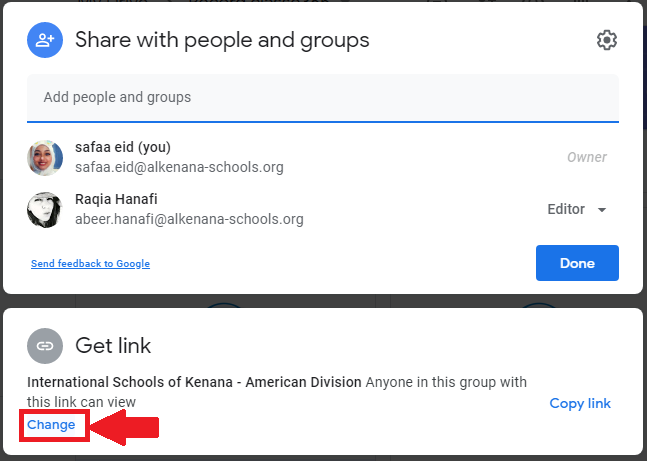
-Right click on the folder and follow the steps to share !.
-Click “Change”.
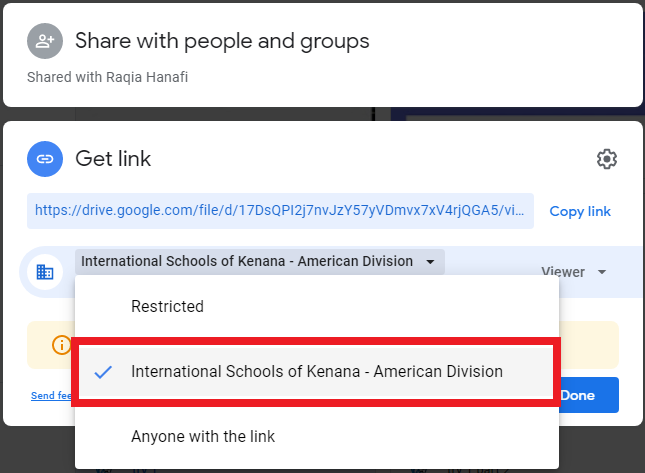
-Change it to “International Schools of Kenana – American Division” .
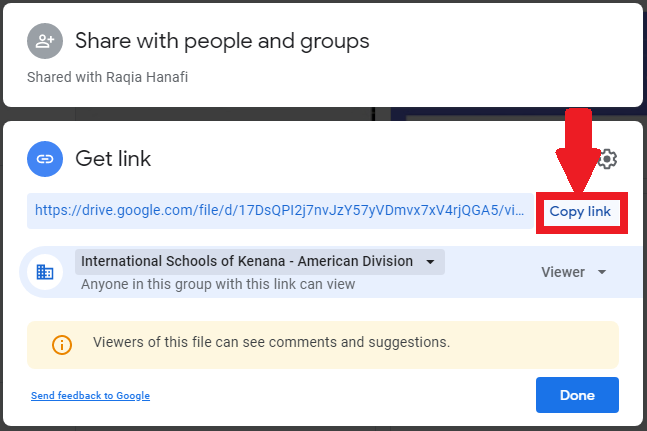
-Paste the copied link in discussion on SLMS,don`t forget to click “Done”.
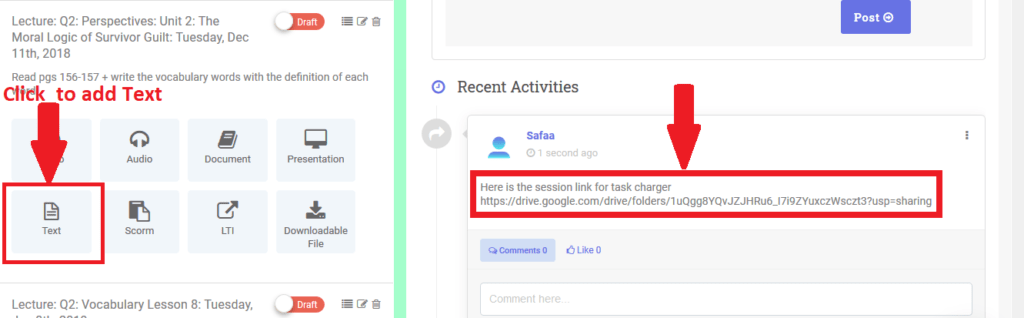
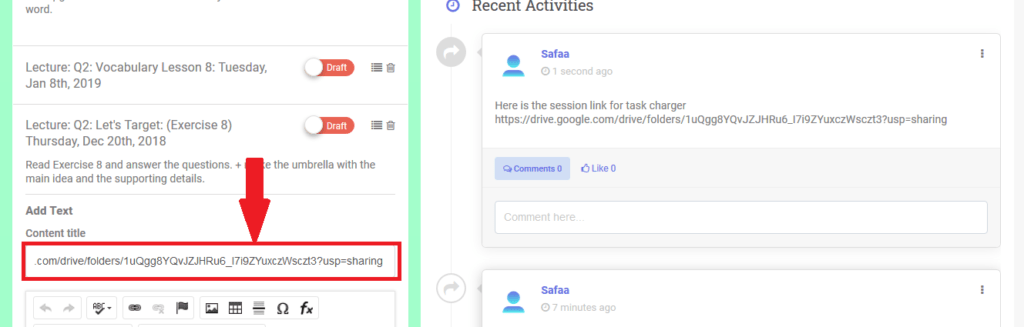
-Go to SLMS on your subject and share the link of your recorded video on discussion and in flip class in the same task that the video recorded for
and click add text and paste the link in it.
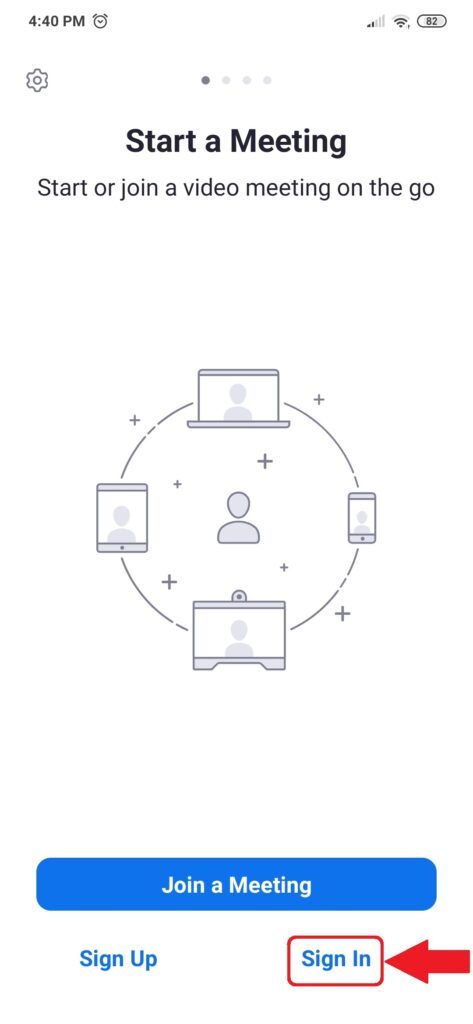
2-Using the “ZOOM APP”.
Download the App from


-Click “Sign in”
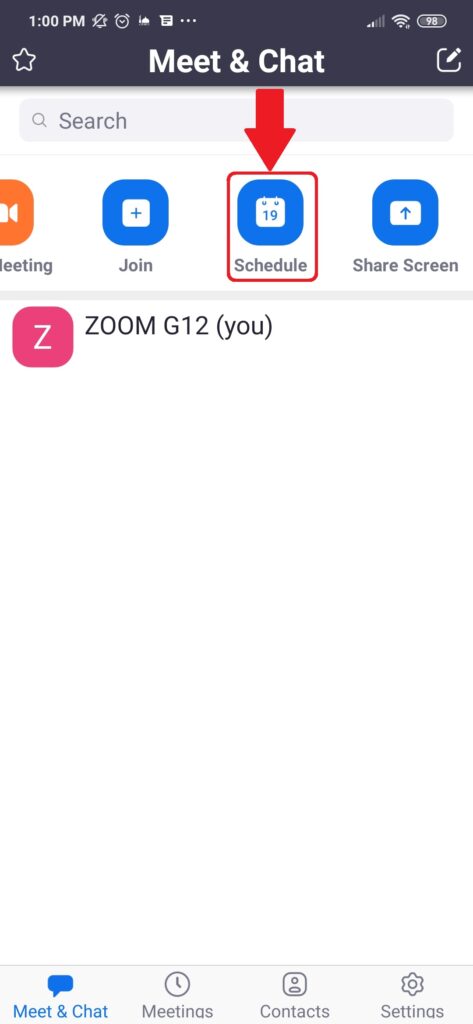
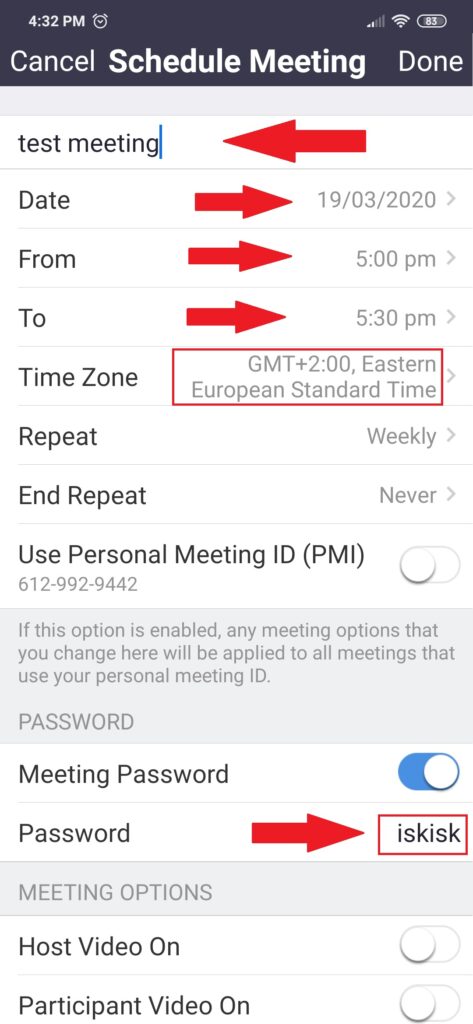
-Click on “Schedule”.
-Set the topic name, the date and the duration of the meeting and make sure to pick time zone”+2 Cairo” .
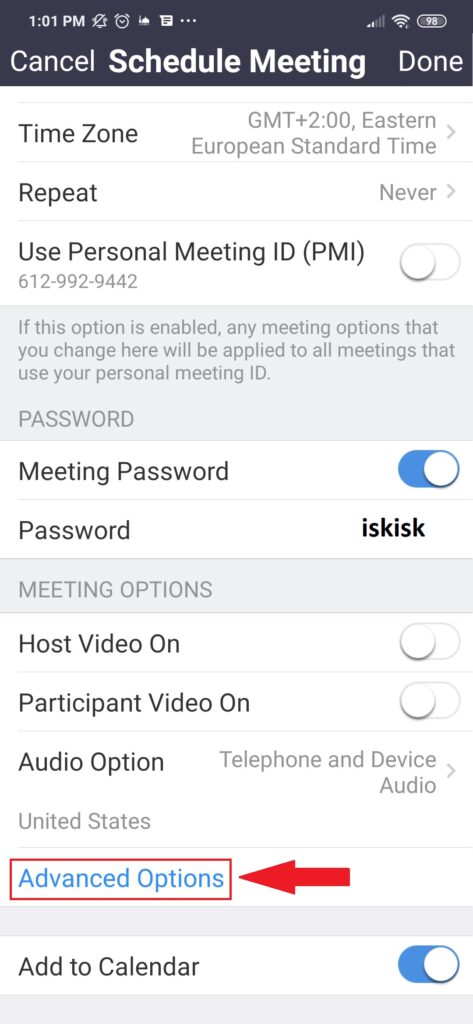
-Set the password “iskisk” .
-Click on “advanced options”.
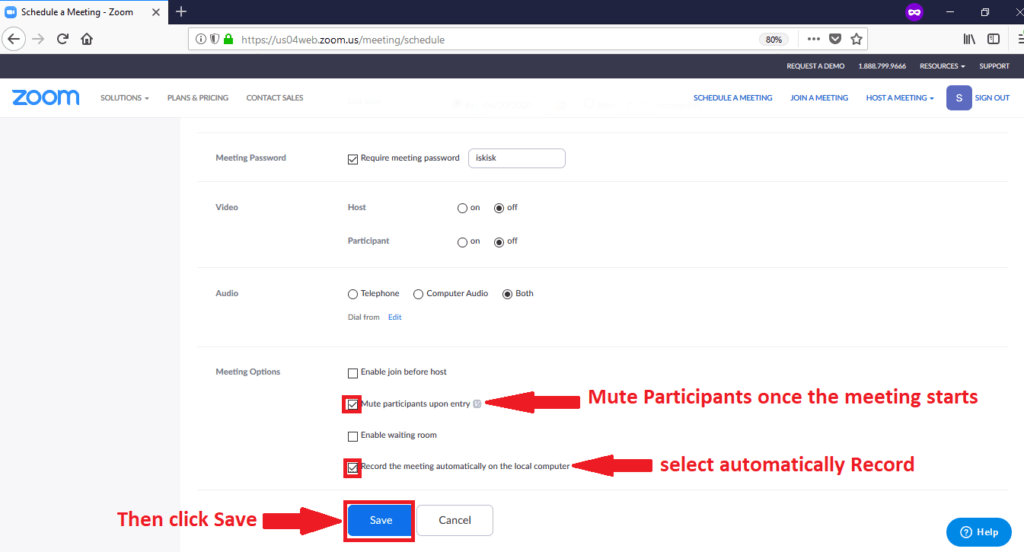
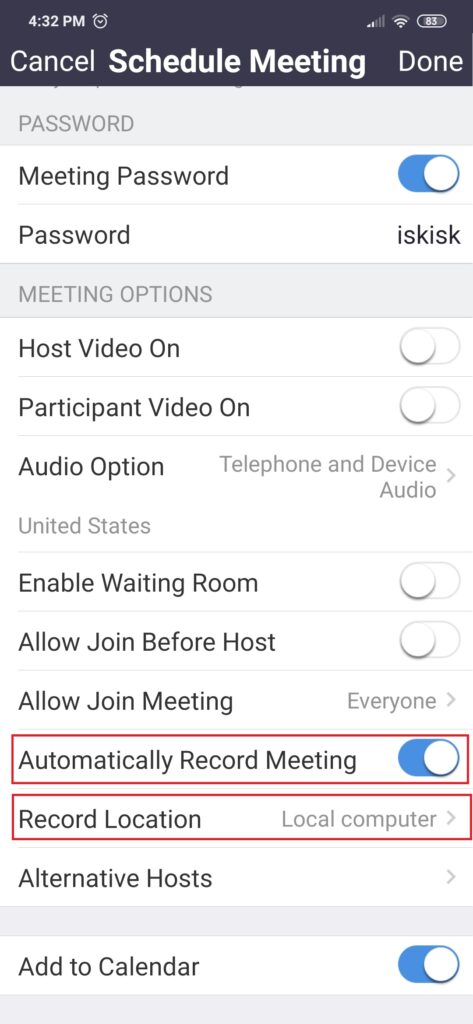
Set the “Automatically Record the Meeting” & Pick “Record Location” Local Computer.
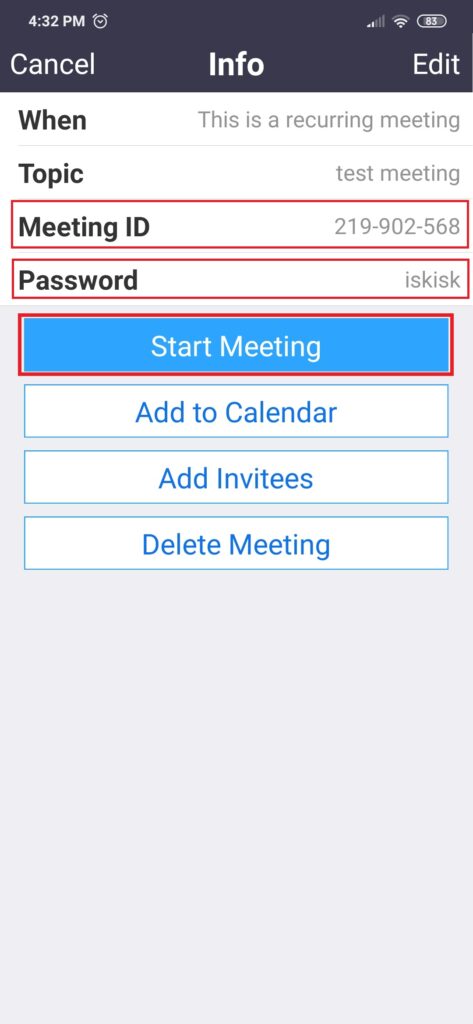
-Copy the “meeting ID ,Meeting Password ” and paste it on SLMS in your own subject Then Click on “Start Meeting”.
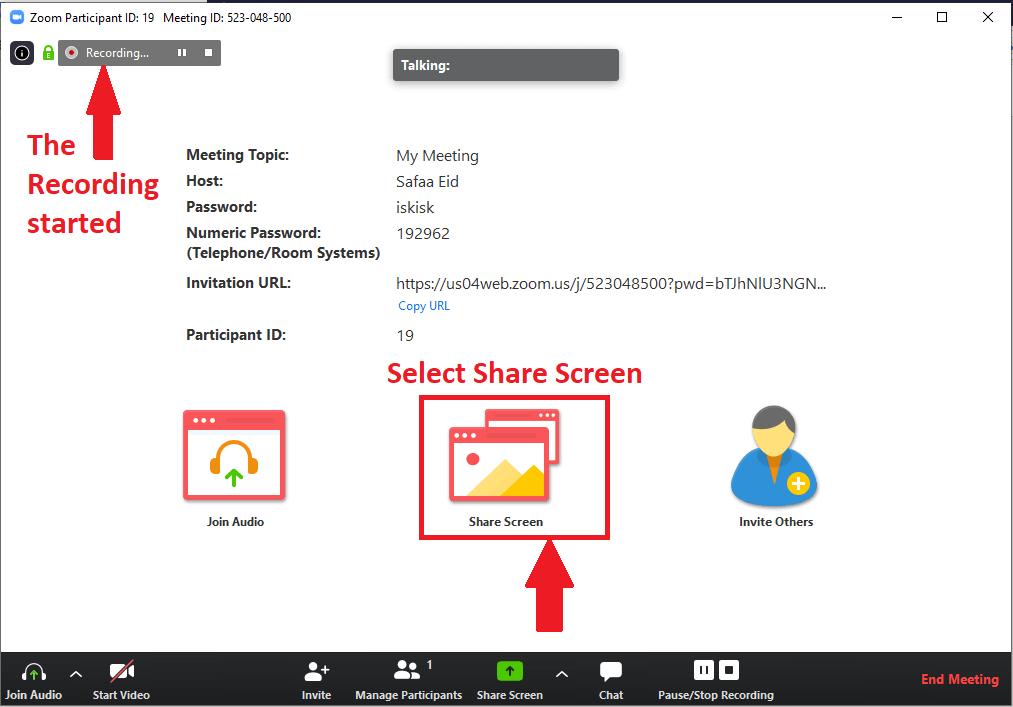
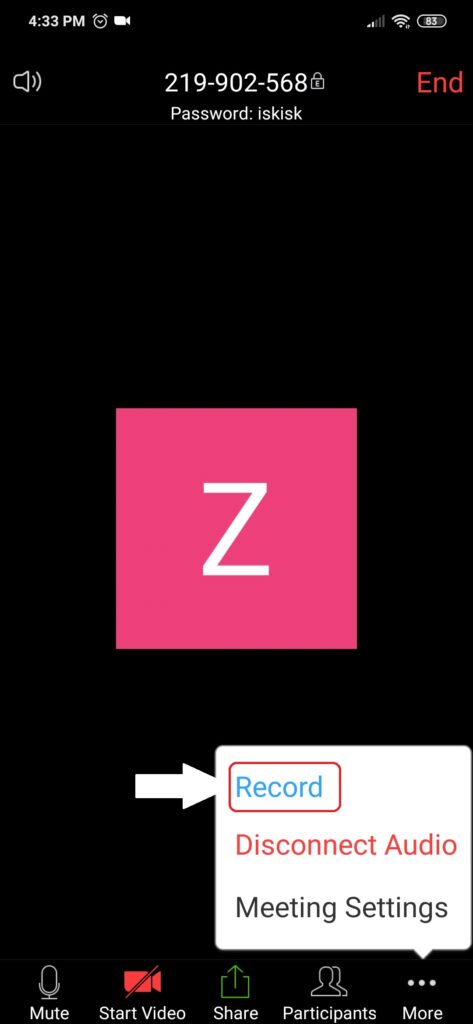
-Click on “Record” to start recording the session.
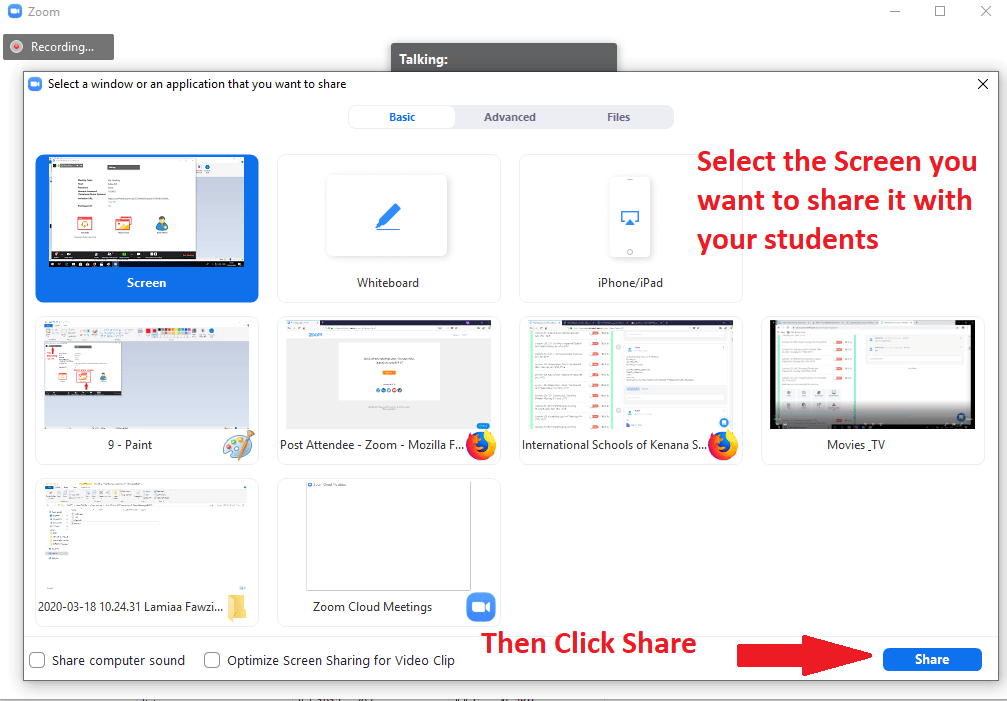
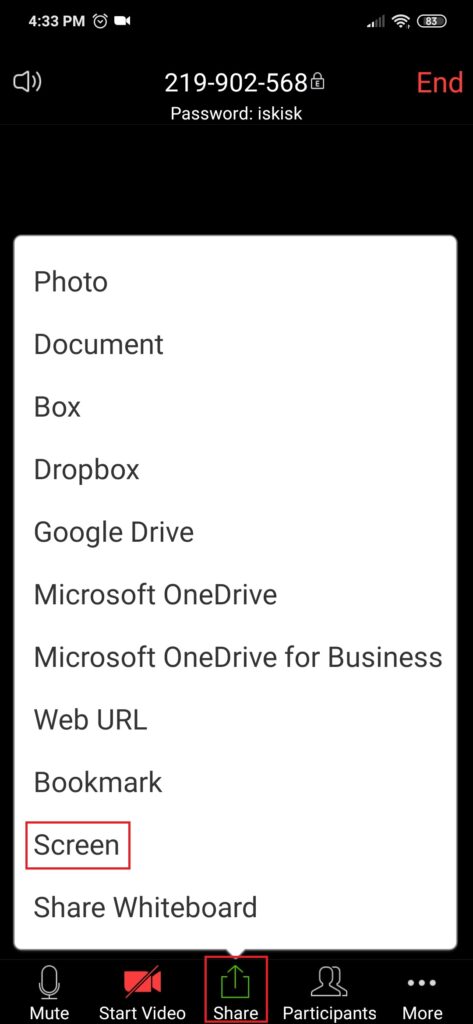
-Click on Share and Select “Screen”.
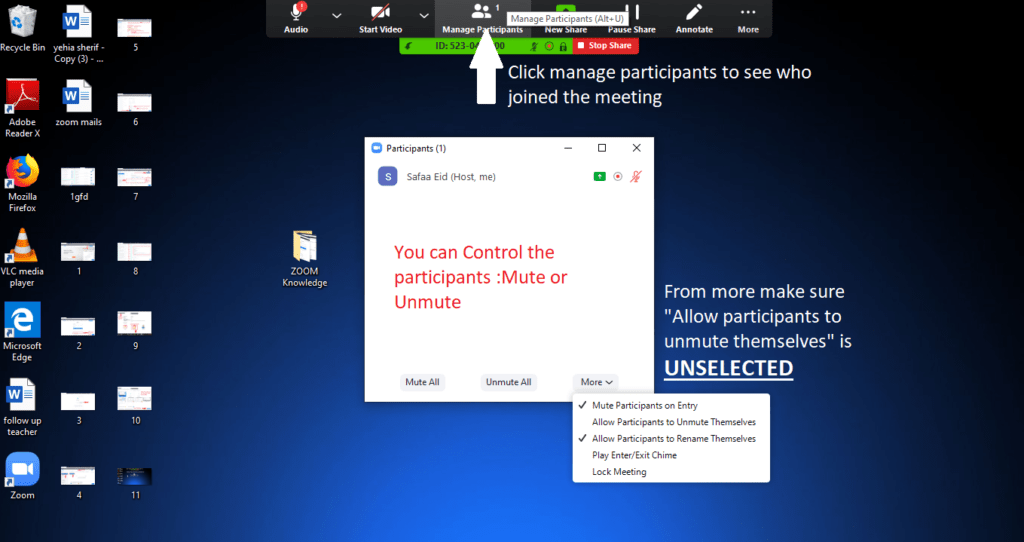
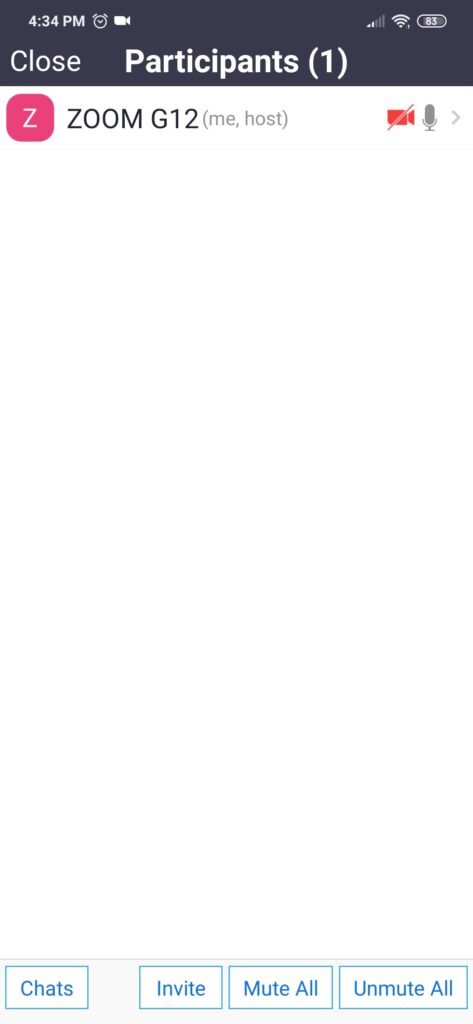
-Click on “Participants” to control them (Mute or Unmute).
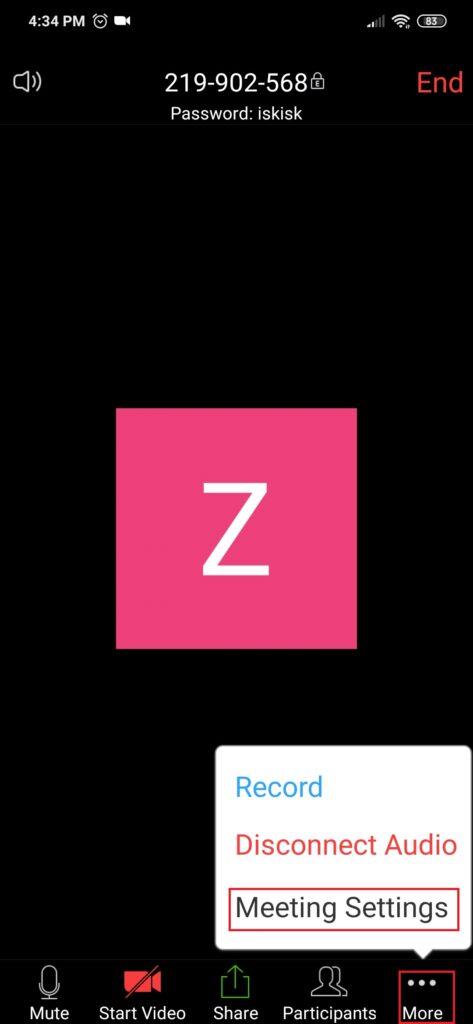
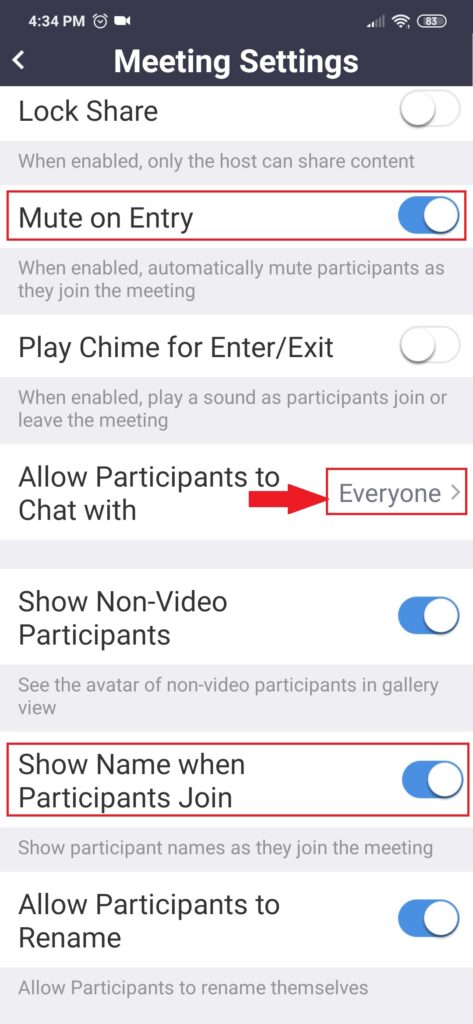
-Click on “Meeting Settings” to get more options.
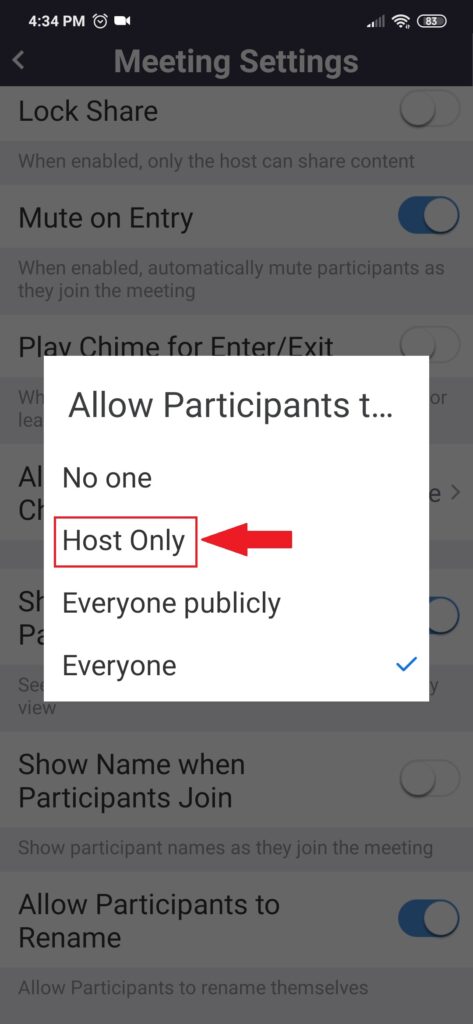
-Set the Meetings Settings as shown and click on “Allow Participants to chat with—Everyone to change it”.
-Select “Host only” so the teacher on can chat with the students and they do not chat with each other.
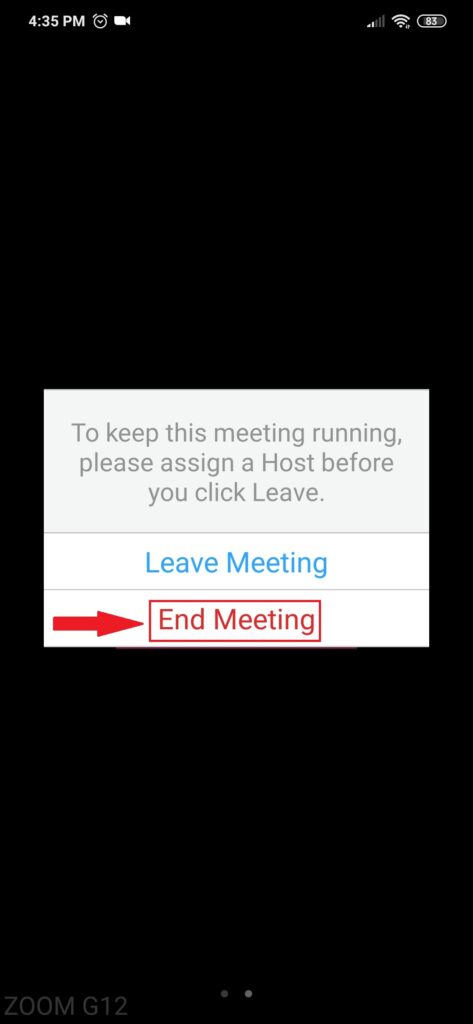
-After you finish your session click on “End”.
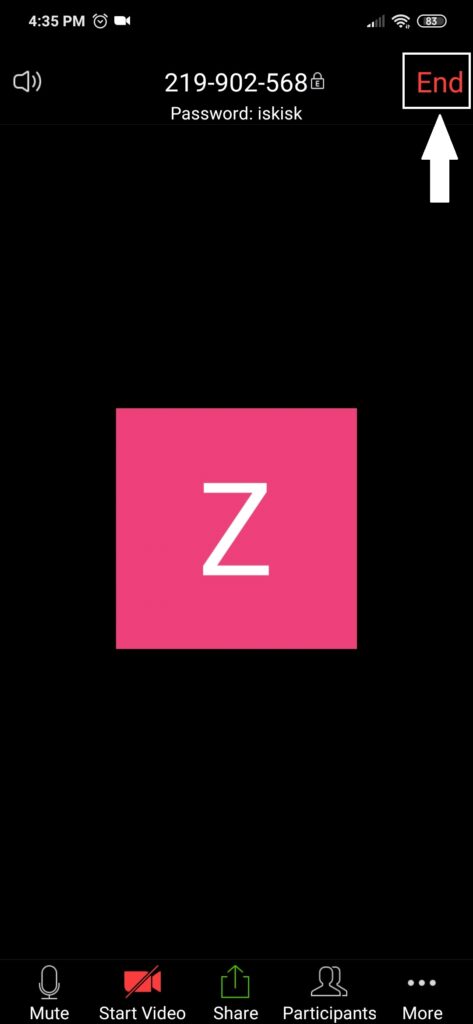
-Select “End Meeting”