
-First Download “EZMira” Program via the link below.
-Then install the program and follow the next steps:
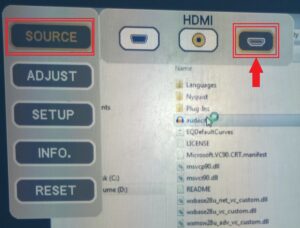
-Frist adjust the projector to be set on “HDMI” by doing the following:
1-If you are using remote type1.
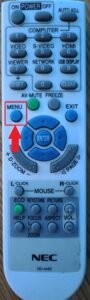
-Click the “Menu” button then “Source” then move with the arrows until you reach “HDMI” then press enter.
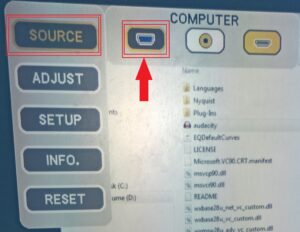
-After you finish your session readjust the projector to computer.
2-If you are using remote type 2, Just click “HDMI” button and when you finish your session click “Computer” button .

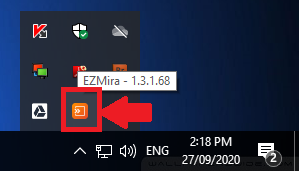
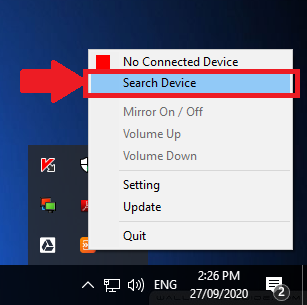
-After you install the program open the arrow near the clock, then click the icon shown below.
-Click “Search Device”.
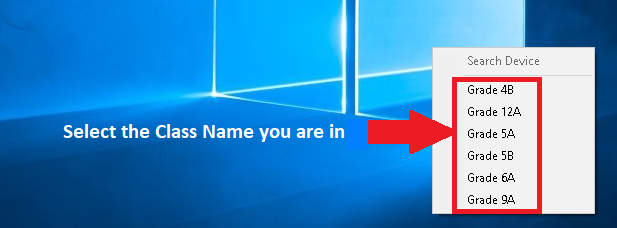
-Select the class WIFI name your are in.
-When your finish your session in the class and about to move to another, Make sure to exit that class WIFI name by doing the following steps:
-Open the arrow near the clock, then click the “EZMira” icon ,Then Click “Mirror On / Off”.
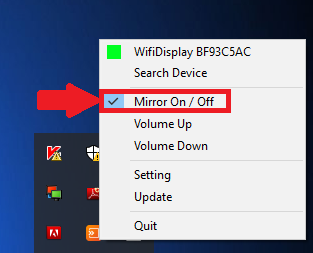
-When you go to the other class follow the same steps to connect to the class WIFI name.