We are always innovating and enhancing the software to ensure success at all levels of your organisation. We have now introduced the enhanced pre-admission module (CRM) which allows you to create multiple different types of forms, create your own workflows, manage multiple different payment settings and much more.
To get started, Hover over CRM – Enroll and Forms as shown in the below image:
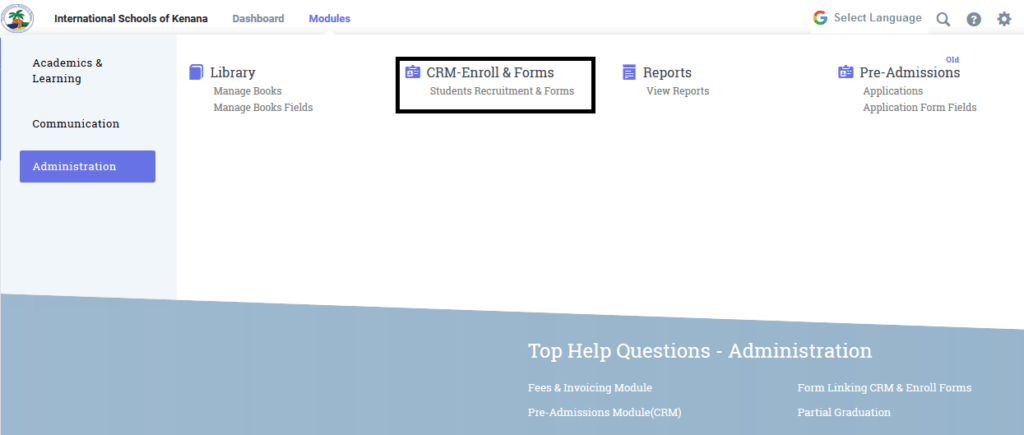
Once inside the module, there will be two tabs “Forms” and “Submissions”. The “Forms” tab is where the user can create and manage different types of forms and the “Submissions” tab is used to view all the submitted forms and applications.

The second step is to create the form and put in the general details of the form.
There are two types of forms that can be selected, pre-admission and general.
Pre-admission form – These type of forms can be used for enrolment of the student to your organisation.
General form – These type of forms are used for general enquiries.
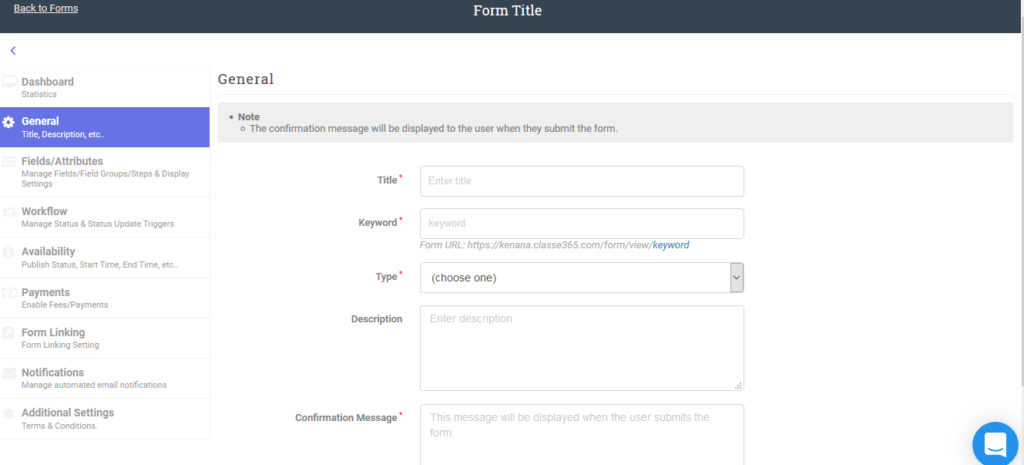
Note: Description can have HTML attributes including bootstrap classes for best front-end view.__
Note: if you want to embed this application form on your website you can simply use the URL below Keyword and use this on your website
The embed code will have an HTML tag as below:
<iframe width=’1200′ height=’800′ allowFullScreen=’allowFullScreen’ src=’https://your_subdomain.classe365.com/forms/view/keyword’ scrolling=’yes’ frameBorder=’0′></iframe>
<!—
scrolling=’auto|yes|no’ is used when you want to control scroll bar(horizontal/vertical) in your embed code
allowFullScreen=”allowFullScreen”
frameBorder=”0″
Are the functions you can override the embed code, Note: full screen and border function are in camelcased
–>
3. Create all the required fields/attributes to the form.
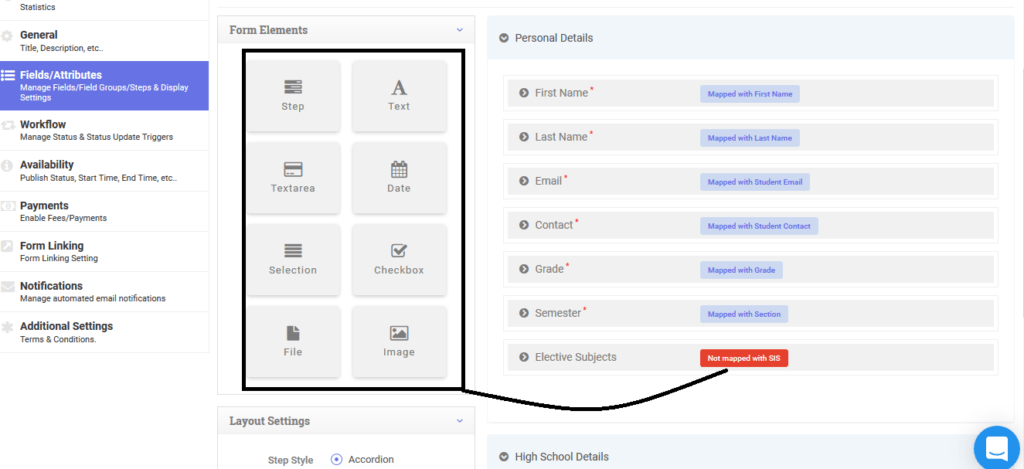
Text field – Text field is used to enable the user to input any text in the field.
Text area field – Text area field is a multi-line field and can accomodate unlimited number of characters.
Date field – Date field appears as the date format as per the format set.
Selection – Selection field allows to present the form filling user with a series of possible choices (multiple choices)
File – This field allows to create any attachments in the form.
Checkbox field – This field creates checkboxes in the form.
The user can create any number of steps in the application form by clicking on the “Step” field.
The layout settings can be set as per the user’s requirement.
Create your own workflow:
You can now create your own workflow ;
For the Pre-Admission type of forms, Pending, Accepted, Admission Offered, and Enroll are the default statuses.
For pre-admission type of forms, the last status Enroll/Closed will enroll the submission into SIS by creating a student into SIS as per the fields mapping set.
For the General type of forms, Pending and Closed are the default statuses. First and the last statuses are mandatory for both the types of forms, however, the user can customize the label and colour as per the user’s discretion.
Click on “+Add” to create a new status with a description and colour of choice.
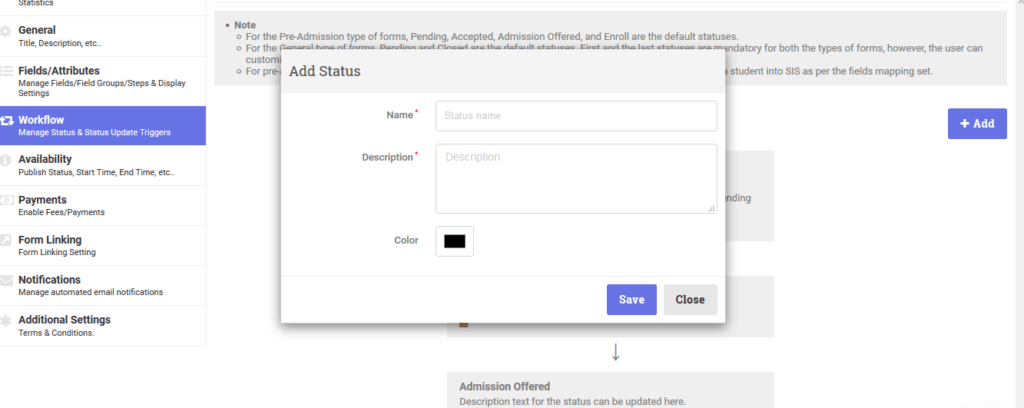
Once the new status is created it can be edited, dragged & dropped and deleted as shown in the above image.
Note- You cannot drag & drop the newly created status to the place of the default statuses.__
5. Availability:
This section is used to manage the availability of the forms.
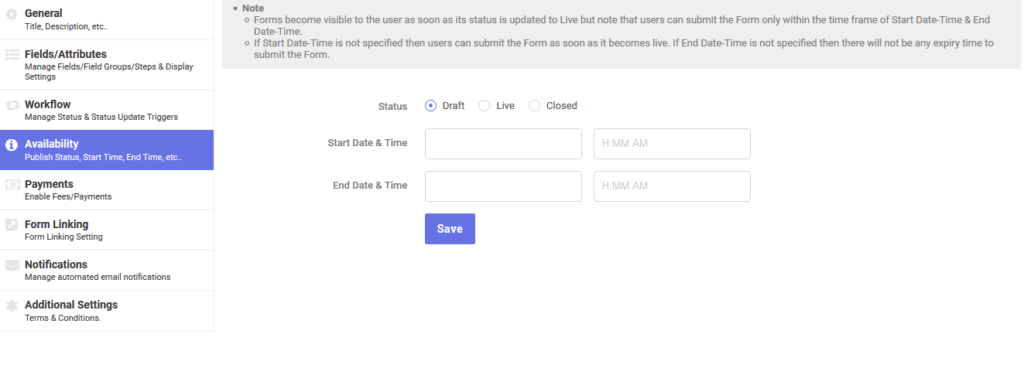
Forms become visible to the user as soon as its status is updated to Live but note that users can submit the Form only within the time frame of Start Date-Time & End Date-Time.
If Start Date-Time is not specified then users can submit the Form as soon as it becomes live. If End Date-Time is not specified then there will not be any expiry time to submit the Form.
6. Payments:
You can now create multiple fee categories and assign them to the forms.
Note – You need to subscribe to the fee/invoicing module to enable this.
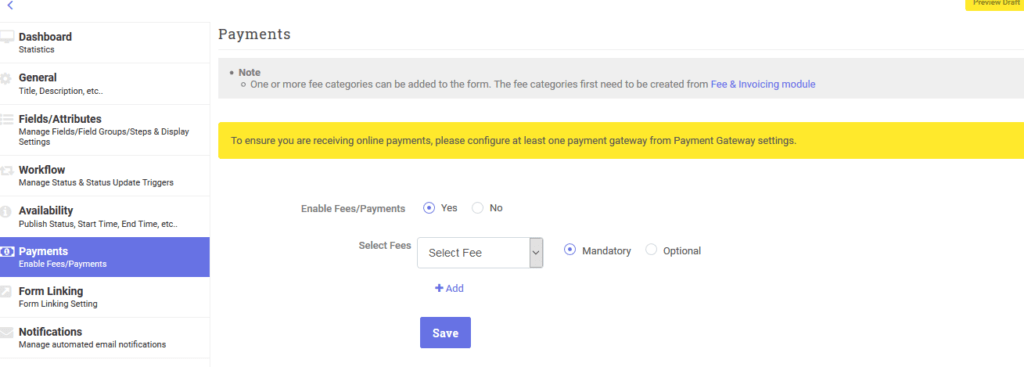
Once you enable fee/payments, you can select the required fee categories that have been created in the fee/invoicing module. You can make this mandatory or optional.
Similarly you can add multiple fee categories to the list by clicking on “+Add”.
7. Form Linking:
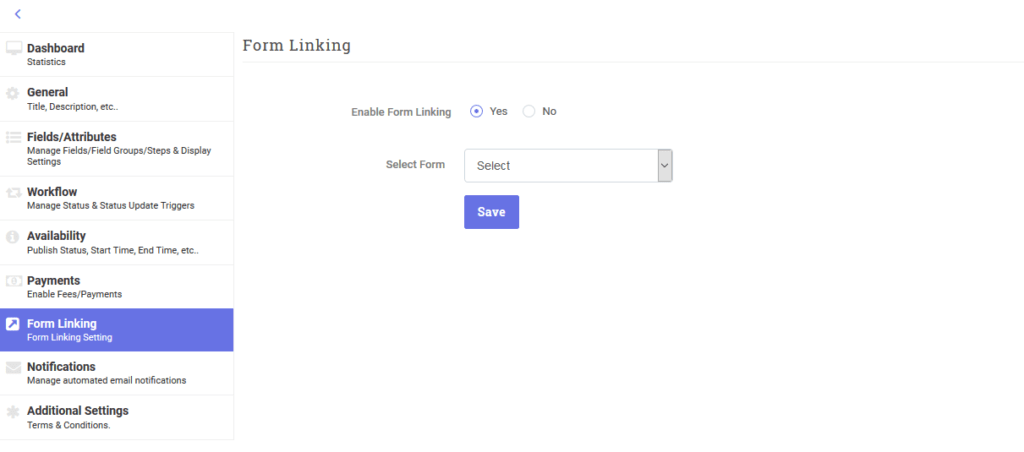
The next steps is to create the email template from the notifications step. To get more detailed information about how the “link-forming” functions, Please click on this link
8. Notifications:
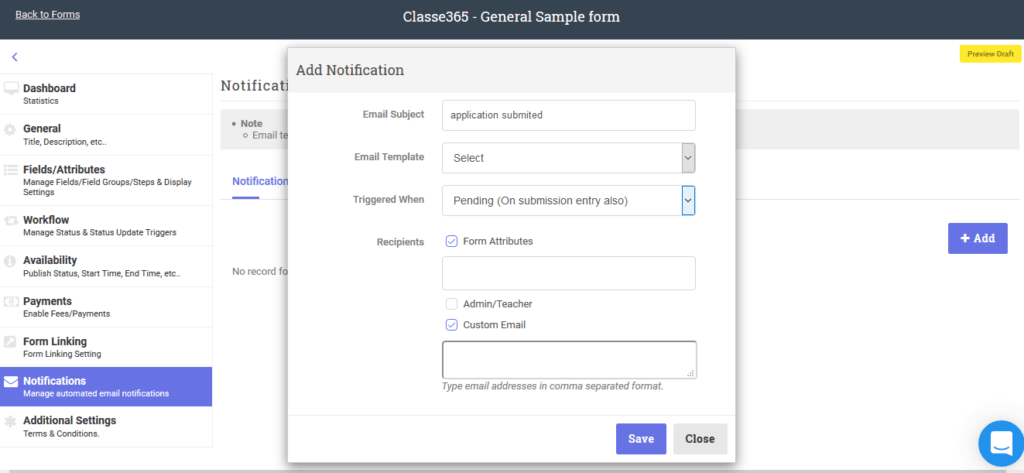
The user first needs to create the email templates. Click on “+Add” to create a new template.
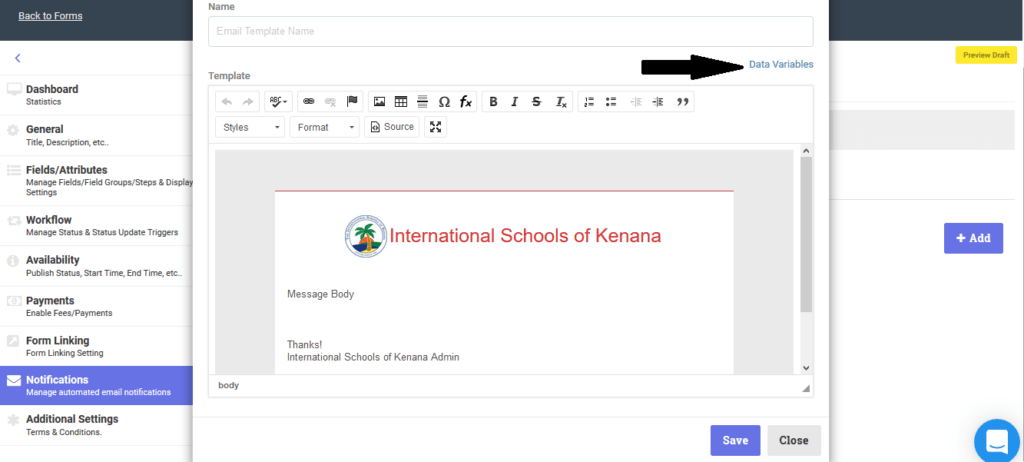
Once the email template has been created, click on the notifications tab and select “+Add” to create a new notification.
Here the email notification settings can be set, the email subject, email template to choose (Templates that was created in the email templates section), when should the email notification be triggered and the recipients.
The recipients can be admin/teacher in the database, custom email address and form attributes. The form attributes are the email addresses that have been created in the application form.
For ex: if you have created an email address for a guardian then this field will be shown when the form attributes option is selected.
Terms & Conditions:
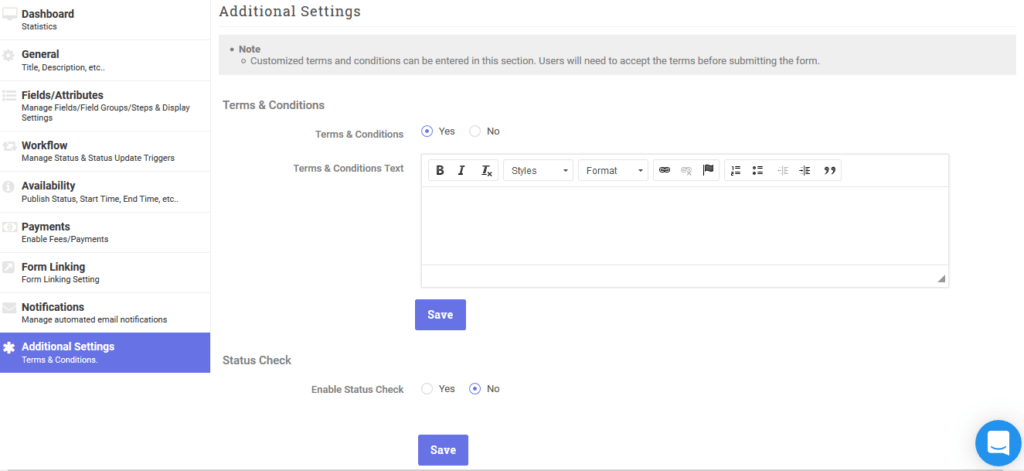
Here you can add any text for terms & conditions.
Once the form has been created, you can manage all the submissions from the submissions tab:
Submissions:
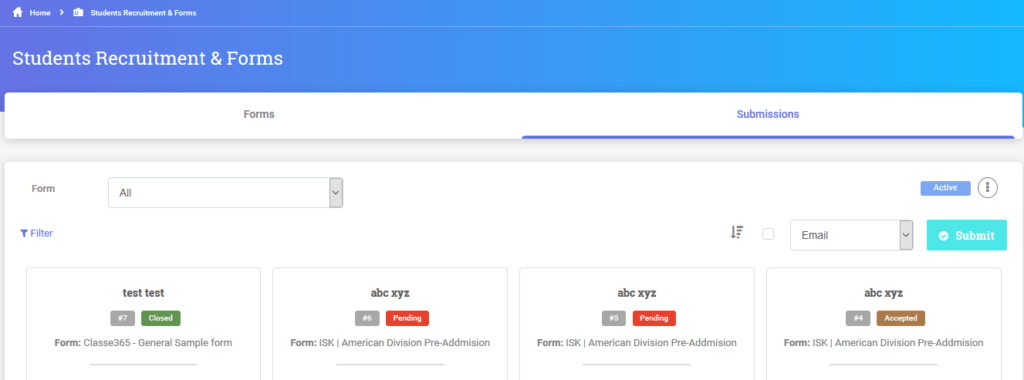
We have provided the option of archiving the submissions if required. You can now also change the view of active, archive, all submissions. You can also export all these in a csv format.
You can select all the different types of forms created and then view only the submissions of those forms as shown in the above image.
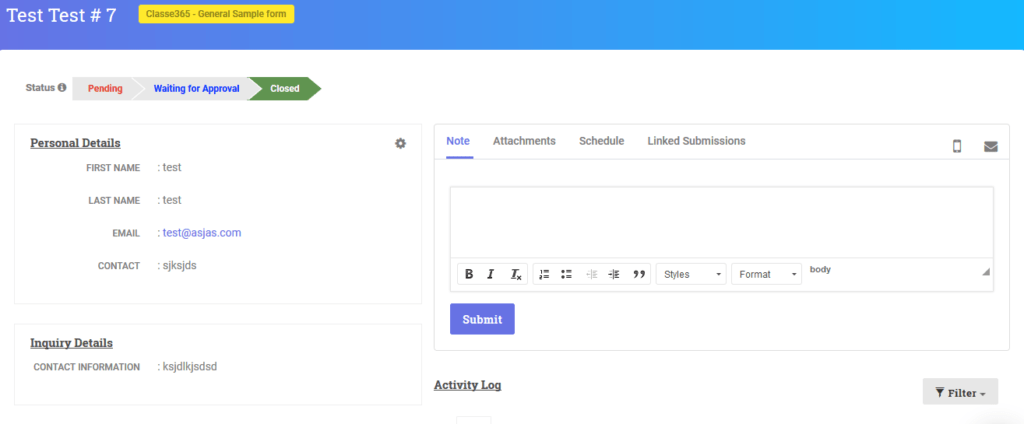
Inside the submissions, you can manage all the application forms.
If you have any questions, queries, concerns please contact our support team at [email protected] or use our efficient chat support for quick and fast response.
